How to Get and Use Your RedotPay Virtual Card: The Complete 2026 Manual
Navigating the world of crypto-fiat integration can feel like a maze, but I’ve found that getting your hands on a RedotPay virtual card is surprisingly streamlined if you know the exact steps. As we move through 2026, the efficiency of these digital assets has only improved, allowing us to bridge the gap between our portfolios and daily spending in minutes.
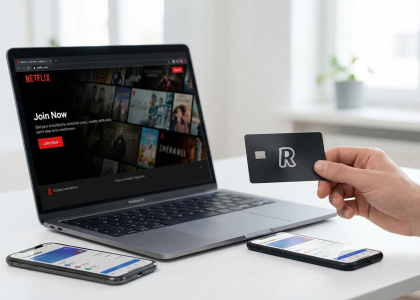
To begin, I recommend downloading the official app directly from the Apple App Store or Google Play Store. Once you’ve registered with your email or phone number, the most critical step is the Identity Verification (KYC). You’ll need a valid government-issued ID. In my experience, the system is quite robust; as long as your lighting is clear, the automated approval usually wraps up within 5 to 10 minutes.
🔥 RedotPay Virtual Card (Top Pick 2026)
The RedotPay Virtual Card lets you top up with USDT, BTC, or ETH and pay anywhere online — instantly and securely.
- ✅ No annual fee
- ✅ Instant virtual card
- ✅ Supports USDT, BTC & ETH
- ✅ Works with Google Ads & Facebook Ads
- ✅ Global payments, fast & secure
- 🎁 Get $5 welcome bonus
Top up crypto, spend worldwide. Perfect for ads, subscriptions, and daily payments.
Step-by-Step Activation
- Deposit Funds: Navigate to your wallet and deposit your preferred cryptocurrency. RedotPay supports various assets, but keep in mind that for every Crypto conversion, there is a transparent 1.2% fee applied.
- Card Selection: Click on the “Cards” icon at the bottom of the interface. You will see the option for a Virtual Card.
- Payment & Issuance: The virtual card usually carries a one-time issuance fee (often $10 USD). Confirm the payment using your deposited balance. Once confirmed, your card details—number, CVV, and expiry—are generated instantly.
I always remind users to stay aware of the cost structure: while the conversion fee is 1.2%, the standard transaction fee for payments is 1%. This makes it one of the more competitive options in the current market for those of us who want to spend USDT or BTC as easily as cash.
Related Articles
- Managing Your RedotPay Card Security Settings
- What should I do if an error occurs on the RedotPay payment page?
- When the ATM cash withdrawal fails but the account balance is deducted, what should I do?
- What steps can I take to avoid payment rejections?
- Where You Can Use Your RedotPay Card
Did this answer your question?
Why Choose RedotPay? Bridging Digital Assets with Daily Retail
I’ve spent years navigating the landscape of crypto-fiat gateways, and I can tell you that the real challenge isn’t just owning digital assets—it’s spending them without a headache. That is exactly where RedotPay steps in to bridge the gap. It transforms your cryptocurrency from a dormant entry in a wallet into a fluid tool for everyday retail.
When I look at why RedotPay stands out in this crowded market, it comes down to its seamless integration into your existing financial life. Whether you are grabbing a morning coffee or paying for a global SaaS subscription, RedotPay handles the heavy lifting of the Crypto conversion process instantly at the point of sale. You don’t have to manually swap tokens for hours; the system does it for you with high efficiency.
The fee structure is another area where I find it particularly competitive. In my experience, transparency is key, and RedotPay keeps it straightforward:
- Flat Transaction Fee: A lean 1% on transactions.
- Conversion Fee: Only 1.2% for shifting your digital assets into spendable fiat.
Beyond the numbers, it’s about accessibility. I’ve found that the ability to link this virtual card to Apple Pay or Google Pay creates a “tap-and-go” experience that feels no different from using a traditional bank card. It removes the friction of the blockchain, allowing you to leverage your portfolio’s value in the physical world without jumping through hoops.
Related Articles:
- Managing Your RedotPay Card Security Settings
- What should I do if an error occurs on the RedotPay payment page?
- When the ATM cash withdrawal fails but the account balance is deducted, what should I do?
- What steps can I take to avoid payment rejections?
- Where You Can Use Your RedotPay Card
Did this answer your question?
😞 😐 😃
Initial Setup: Establishing Your Encrypted Wallet Profile
To begin your journey with RedotPay, I first focus on establishing a secure foundation by setting up your encrypted wallet profile. This isn’t just a standard registration; it is the bridge between your digital assets and real-world spending power. I start by downloading the official RedotPay app, ensuring I use a secure connection to protect my future transactions.
During this initial phase, I provide my primary email address or mobile number to create the account. Security is my top priority here, so I immediately move to enable Two-Factor Authentication (2FA). This adds an essential layer of “encryption” to my profile, shielding my funds from unauthorized access. It is important to note that while I am setting up this digital gateway, I am also preparing for the 1% fiat deposit fee and the 1.2% crypto conversion fee that apply when managing the balance within my profile.
I always double-check my login credentials during this stage. If I ever find myself asking, “What should I do if I forgot my login details?”, I know the app provides a recovery path, but getting it right the first time ensures a smoother onboarding experience. Once my profile is live, I am
Compliance Checklist: Navigating the ID Validation Protocol for Higher Limits
To truly unlock the full potential of my RedotPay experience, I found that completing the advanced Identity Verification (KYC) was the most critical step. While the basic tier gets you started, navigating the ID validation protocol is the only way to secure higher transaction limits and ensure seamless global payments. Here is my personal checklist to help you breeze through the compliance process without hiccups.
1. Prepare Your Primary Identification
I always ensure my documents are valid for at least six months beyond the current date. RedotPay typically requires one of the following:
- Passport: The gold standard for international compliance.
- Government-Issued ID: Ensure it is a high-quality plastic card (paper IDs are often rejected).
- Driver’s License: A viable alternative in many supported regions.
2. Optimize the Capture Environment
In my experience, the automated AI validator is sensitive to lighting. I suggest finding a spot with natural light but no direct glare. Place your ID on a dark, flat surface to create a clear contrast, ensuring all four corners of the document are visible within the camera frame. Blur is the enemy here; if I can’t read the text on my screen, the validator definitely won’t be able to either.
3. The Liveness Check (Biometric Sync)
This is where I verify that I am a real person. When prompted for a selfie or a liveness scan, I make sure to remove my glasses and hat. I follow the on-screen cues—usually a slow head rotation or a blink—to sync my biometrics with my ID data. This level of security is exactly what allows for the 1% deposit fee and the 1.2% crypto conversion fee to remain so competitive.
4. Verify Residential Data
For the highest limit tiers, I sometimes need to provide proof of address. I keep a digital PDF of a utility bill or a bank statement (issued within the last 90 days) ready. It is vital that the name and address on this document match my RedotPay profile exactly.
Pro-Tips for Success
If you encounter issues during this process, I highly recommend checking out these Related Articles in the help center:
- Managing Your RedotPay Card Security Settings
- What steps can I take to avoid payment rejections?
- What should I do if an error occurs on the RedotPay payment page?
By following this protocol, I transitioned from a restricted user to having a fully functional virtual card ready for Crypto conversion and worldwide spending. Once verified, the worry of “What should I do if an error occurs?” or “What should I do if ATM cash withdrawal fails?” becomes a rarity because my account is fully compliant and trusted by the network.
Did this answer your question?
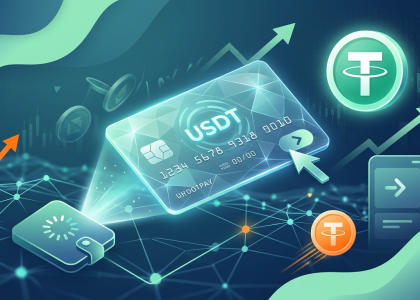
Capitalizing Your Account: Transferring USDT and Other Supported Tokens
To get your virtual card up and running, I’ll walk you through the essential step of funding your account. Before you can pay the card issuance fee or start shopping, you need to move your digital assets into the RedotPay wallet. I recommend using USDT for its stability, though the platform supports several major tokens.
First, I open the RedotPay app and navigate to the “Deposit” section. From there, I select the specific cryptocurrency I want to transfer. It is crucial to choose the correct network—such as TRC20 or ERC20—to ensure the funds arrive safely. I then copy my unique deposit address and paste it into the withdrawal field of my external exchange or private wallet. Once the blockchain confirms the transaction, the balance reflects in my account almost instantly.
I always keep a close eye on the fee structure when managing my balance. While transferring funds onto the platform is straightforward, keep in mind that when you spend or convert your assets, a 1% Crypto conversion fee applies. Additionally, if you eventually use your card for transactions in a currency other than the card’s base currency, a 1.2% fee will be charged. Understanding these costs upfront ensures I manage my capital efficiently without any surprises.
Related Articles
- Managing Your RedotPay Card Security Settings
- What should I do if an error occurs on the RedotPay payment page?
- When the ATM cash withdrawal fails but the account balance is deducted, what should I do?
- What steps can I take to avoid payment rejections?
- Where You Can Use Your RedotPay Card
Did this answer your question?
😞
😐
😃
Others:
- What should I do if I forgot my login details?
- Will I receive a physical card after opening a currency account?
One-Click Issuance: Confirming Your Virtual Card Details and Instant Activation
Now that you have successfully completed the identity verification process and topped up your account, I am going to guide you through the final, most exciting phase: instant card issuance. Unlike traditional banking where you might wait weeks for a piece of plastic, I can tell you from experience that the RedotPay virtual card is ready for action the moment you click that final button.
When you navigate to the “Card” section in your app, you will be presented with the final confirmation screen. Here is exactly what I do to ensure a smooth activation:
- Verify Your Details: Double-check that your name and chosen billing information are correct. Accuracy here is crucial for passing the CVV/Address verification (AVS) used by many global merchants.
- Understand the Fee Structure: Transparency is key in the crypto world. I always remind users that while the card is revolutionary, you should be aware of the 1.2% fee for certain transactions and the 1% crypto conversion fee that applies when you swap your digital assets for fiat during a purchase.
- The “One-Click” Execution: Once I click “Order Card,” the system performs a real-time check of your balance. Because this is a virtual product, there is no shipping delay. The system deducts the issuance fee, and within seconds, your card number, expiry date, and CVV are generated.
I find it incredibly empowering that as soon as that card appears on your screen, it is instantly active. You don’t need to call a hotline or wait for an SMS. I usually copy the card details immediately and add them to Apple Pay, Google Pay, or my favorite e-commerce site to test it out. Whether you are paying for a subscription or grabbing a coffee via NFC, your crypto is now as liquid as the cash in your wallet.
If you ever run into a snag during this instant activation—perhaps a momentary timeout or a balance error—don’t panic. I recommend checking the “What should I do if an error occurs on the RedotPay payment page?” section in the help center, but in 99% of cases, that single click is all it takes to bridge your crypto wealth with the real-world economy.
Integration Hacks: Linking RedotPay to Global Payment Wallets for Offline Use
Once you have successfully applied for your RedotPay Virtual Card, the real magic happens when you bridge the gap between your crypto assets and the physical world. Since this is a virtual card, you cannot swipe it at a checkout counter, but I have found that linking it to global payment wallets is the ultimate “hack” to enable seamless offline payments at millions of merchants worldwide.
Step-by-Step Integration with Apple Pay, Google Pay, and Samsung Pay
To use your RedotPay card for contactless (NFC) payments at grocery stores, cafes, or gas stations, follow these steps:
- Open your Wallet App: Launch Apple Wallet, Google Pay, or Samsung Pay on your smartphone.
- Add a New Card: Select the option to add a credit or debit card. Manually enter your RedotPay card number, expiry date, and CVV (found in the RedotPay app).
- Verification: You will receive a verification code via SMS or email. Enter this code to finalize the link.
- Tap to Pay: Look for the contactless symbol at any merchant terminal. Double-click your side button (or open your wallet) and tap your phone to pay.
Understanding the Costs of Offline Usage
When I use my RedotPay card for daily transactions, I always keep the fee structure in mind to avoid surprises. Efficiency is key, and knowing your numbers helps you manage your crypto balance better.
| Transaction Type | Fee Rate |
|---|---|
| Transactions in Card Currency (e.g., USD) | No fee |
| Transactions in Other Currencies (FX Fee) | 1.2% |
| Crypto Conversion Fee | 1% |
For example, if you are shopping in a currency other than USD, a 1.2% fee applies. Additionally, when the system converts your USDT/BTC/ETH to cover the transaction, a 1% crypto conversion fee is standard. Despite these small costs, the convenience of spending crypto at a local coffee shop is unparalleled.
Pro Tip: To ensure your transaction doesn’t fail at the register, I highly recommend checking Managing Your RedotPay Card Security Settings in the app to enable “Online Payments” and “International Transactions” before you head out.
By integrating your virtual card with these digital wallets, you effectively turn your phone into a crypto-powered physical card, bypassing the need for a plastic card entirely. This setup allows you to leverage the full utility of the RedotPay ecosystem in the real world.
Maximizing Utility: Transaction Strategies and Troubleshooting Common Barriers
To get the most out of my RedotPay virtual card, I’ve learned that success lies in understanding the fee structure and navigating potential transaction hurdles with a proactive mindset. When I use my card, I always keep in mind the 1.2% fee associated with Crypto conversion. This is a small price to pay for the liquidity it provides, but I factor this into my total balance to ensure every transaction clears without a hitch. Additionally, for certain types of transactions, there is a 1% fee that I monitor to keep my spending optimized.
I’ve found that the best way to maintain a seamless experience is to stay informed. I frequently revisit the Related Articles provided by the platform to refine my usage. For instance, I’ve mastered Managing Your RedotPay Card Security Settings to toggle my spending limits and international transaction permissions instantly, which is my first line of defense against unexpected declines.
If I ever encounter a bump in the road, I don’t panic. I follow these specific troubleshooting strategies that have saved me time and stress:
- What should I do if an error occurs on the RedotPay payment page? I usually refresh the session, check my stablecoin balance (USDT/USDC), and ensure my VPN is disabled, as IP mismatches can often trigger security flags.
- When the ATM cash withdrawal fails but the account balance is deducted, what should I do? While I primarily use the virtual card, for those using the physical version, I’ve learned that contacting support immediately with the transaction ID is crucial. The system typically reconciles these errors automatically within a few business days.
- What steps can I take to avoid payment rejections? I always verify that the billing address I provide to the merchant matches the one set in my RedotPay profile. Furthermore, I ensure I have enough “buffer” in my wallet to cover the conversion fees mentioned above.
Knowing Where You Can Use Your RedotPay Card is the final piece of the puzzle. I’ve successfully integrated mine with Apple Pay, Google Pay, and major e-commerce platforms like Amazon and Binance. By treating the card as a bridge between my digital assets and real-world utility, I’ve managed to bypass traditional banking barriers entirely.
Did this answer your question?
🔥 RedotPay Virtual Card (Top Pick 2026)
The RedotPay Virtual Card lets you top up with USDT, BTC, or ETH and pay anywhere online — instantly and securely.
- ✅ No annual fee
- ✅ Instant virtual card
- ✅ Supports USDT, BTC & ETH
- ✅ Works with Google Ads & Facebook Ads
- ✅ Global payments, fast & secure
- 🎁 Get $5 welcome bonus
Top up crypto, spend worldwide. Perfect for ads, subscriptions, and daily payments.