Introduction: Why RedotPay is the Go-To Virtual Card for Crypto Users
We’ve reached a tipping point where holding crypto is no longer just about “HODLing” for speculative gains; it’s about the friction-less utility of those assets in the real world. In my years navigating the crypto-fiat bridge, I’ve seen countless platforms promise a seamless spend-to-earn experience, but RedotPay has rapidly emerged as the definitive choice for users who value speed, compliance, and global accessibility.
The primary reason RedotPay dominates the virtual card space is its direct integration with the Visa network, backed by a regulated Hong Kong-based infrastructure. Unlike many competitors that force users through convoluted internal conversion processes, RedotPay allows you to hold your assets in USDT and settle payments at millions of merchants worldwide—from your morning Starbucks run to high-ticket digital subscriptions on AWS or OpenAI.
🔥 RedotPay Virtual Card (Top Pick 2026)
The RedotPay Virtual Card lets you top up with USDT, BTC, or ETH and pay anywhere online — instantly and securely.
- ✅ No annual fee
- ✅ Instant virtual card
- ✅ Supports USDT, BTC & ETH
- ✅ Works with Google Ads & Facebook Ads
- ✅ Global payments, fast & secure
- 🎁 Get $5 welcome bonus
Top up crypto, spend worldwide. Perfect for ads, subscriptions, and daily payments.
Here is why we consider it the current gold standard for crypto-native spenders:
- Instant Liquidity: You aren’t just sending funds to a black hole. When you deposit USDT via the app, the conversion to a spendable balance is virtually instantaneous, bypassing the typical 3-5 day settlement periods found in legacy banking.
- High Approval Rates: Because RedotPay issues cards with robust BIN (Bank Identification Number) profiles, they are rarely flagged by online merchants. This makes them significantly more reliable for Apple Pay, Google Pay, and PayPal integrations compared to the “prepaid” cards of the past.
- Low Barrier to Entry: We appreciate the streamlined KYC process that doesn’t require a traditional bank account, making it a lifeline for the unbanked or those in regions with restrictive local currency controls.
- Multi-Network Flexibility: Whether you prefer the low costs of the Binance Smart Chain (BSC) or the ubiquity of TRC20, the platform supports the networks you actually use, ensuring you don’t lose a chunk of your capital to Ethereum mainnet gas fees just to fund your card.
In our experience, the real “killer feature” is the RedotPay App’s real-time authorization. When you swipe, the system checks your crypto balance, converts the exact amount needed at that moment’s exchange rate, and approves the transaction in milliseconds. You are effectively living on a Bitcoin or USDT standard without ever needing to touch a local bank branch.
Prerequisites for Funding Your RedotPay Virtual Card
Before you even think about initiating a blockchain transfer, there are three non-negotiable hurdles you must clear. I’ve seen countless users lose sleep (and gas fees) because they tried to skip these foundational steps. If your account isn’t correctly staged, your USDT will either bounce or, worse, sit in a pending limbo that requires manual support intervention.
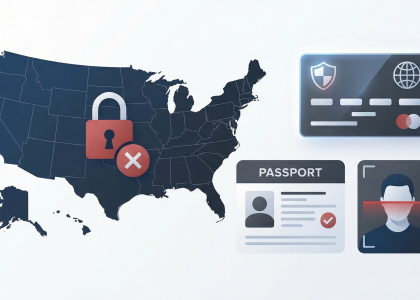
1. Tier 1 Identity Verification (KYC)
You cannot deposit or spend a single cent without completing the Know Your Customer process. RedotPay adheres to global AML (Anti-Money Laundering) standards. You’ll need a valid government-issued ID (Passport, National ID, or Driver’s License) and a quick liveness check (the “selfie” scan). In my experience, the automated system usually approves accounts within 5 to 10 minutes, but if your photos are blurry, expect a 24-hour manual review delay.
2. Active Card Issuance
It sounds obvious, but you must have successfully applied for the virtual card within the app. The “Add USDT” function is technically a wallet deposit, but to use those funds for payments, the virtual card must be Status: Active. If you haven’t paid the $10 USD issuance fee (often discounted with referral codes), your USDT will just sit in your RedotPay wallet balance rather than being accessible for card transactions.
3. Network Alignment and Minimum Thresholds
This is where most rookies get burned. You must have access to an external wallet or exchange (like Binance, OKX, or Bybit) that supports the specific networks RedotPay accepts. As of our current technical stack, we primarily focus on:
| Requirement | Standard / Value | Expert Note |
|---|---|---|
| Supported Networks | TRC20, ERC20, BSC (BEP20), Polygon | Always double-check the “Deposit” tab for real-time changes. |
| Minimum Deposit | $1 USDT | Deposits below this threshold will not be credited and are usually unrecoverable. |
| External Gas | Varies by Network | Ensure your sending wallet has native tokens (ETH, TRX, or BNB) to cover the “push” fee. |
I strongly recommend using BSC (Binance Smart Chain) or Polygon for these initial loads. The transaction costs are negligible compared to the Ethereum mainnet, and the confirmation speed is significantly higher for the RedotPay internal ledger to reflect your balance.
Step-by-Step Guide: How to Add USDT to RedotPay Virtual Card
We execute the USDT transfer directly from your source wallet into the RedotPay ecosystem. Because RedotPay functions as a custodial wallet linked to a Visa/Mastercard payment gateway, you must treat this deposit process exactly like a standard exchange-to-exchange crypto transfer. I process these transactions regularly, and precision with your wallet addresses and network alignment is non-negotiable.
Step 1: Locating Your RedotPay USDT Deposit Address
Open your RedotPay application and navigate to the Wallet interface located on the bottom navigation bar. Select Deposit and tap on USDT from the digital asset list. The system will prompt you to select a specific blockchain network. This is where I see most beginners make critical errors. You must choose the network that matches exactly with the one you plan to use for withdrawal on your external exchange.
- Tap the copy icon directly next to the alphanumeric address string. Never attempt to type this address manually.
- If you are executing the transfer from a secondary device, use the built-in QR code scanner to capture the address natively.
Step 2: Transferring Funds from External Wallets or Exchanges (Binance, OKX, MetaMask)
With your RedotPay address safely on your clipboard, open your funding source. The withdrawal logic remains identical whether you are using a centralized exchange (CEX) or a decentralized Web3 wallet.
From Centralized Exchanges (e.g., Binance, OKX):
- Navigate to your Spot or Funding wallet and initiate a Withdraw command for USDT.
- Select the option to send via a Crypto Network.
- Paste your copied RedotPay deposit address into the recipient field.
- Select the exact corresponding network. If you generated a TRC20 address in RedotPay, you must select Tron (TRC20) on the exchange. Mismatched networks will result in permanently burned tokens.
- Input your withdrawal amount, accounting for the exchange’s flat withdrawal fee, and authenticate the transaction.
From Web3 Wallets (e.g., MetaMask, Trust Wallet):
- Ensure your wallet is connected to the correct RPC network (such as BNB Smart Chain for BEP20 transfers).
- Verify you hold sufficient native gas tokens (like BNB for BSC, or ETH for Arbitrum/ERC20) to cover the network computation fees.
- Click Send, paste the RedotPay address, define the USDT payload, and sign the transaction prompt.
Step 3: Converting USDT to Card Balance for Immediate Spending
RedotPay operates on a real-time liquidation model, which bypasses the clunky manual fiat conversion processes seen in older crypto debit cards. Your deposited USDT resides in your primary asset wallet. When you authorize a transaction via Apple Pay, Google Pay, or a direct physical swipe, the platform’s engine calculates the fiat equivalent at the current spot rate and deducts the exact USDT amount instantly.
To guarantee the gateway pulls from your newly deposited stablecoins rather than other volatile assets you might hold, we must configure the payment priority:
- Navigate to the Card tab within the app and access the Payment Priority settings.
- Drag USDT to the absolute top of the asset hierarchy.
Once the blockchain confirms your initial deposit—typically within 1 to 3 minutes on networks like TRC20 or BSC—your main dashboard balance will refresh. At that exact moment, your virtual card is fully funded and active for global fiat transactions.
Step 1: Locating Your RedotPay USDT Deposit Address
To get your funds moving, you need to think of your RedotPay deposit address as your personal gateway between the blockchain and your Visa card. I’ve seen many users trip up by grabbing the wrong network address, so precision here is non-negotiable. Follow these steps within the app to secure your endpoint.
Open the RedotPay app and navigate to the Assets tab located at the bottom navigation bar. From there, select the Deposit button. You will be presented with a list of supported cryptocurrencies; select USDT (Tether). This is where the interface requires your full attention.
Once you select USDT, you must choose the specific Blockchain Network. RedotPay currently supports several major protocols, and choosing the right one is the single most important factor in avoiding permanent loss of funds:
- BNB Smart Chain (BSC/BEP20): My top recommendation for most users. It consistently offers the lowest withdrawal fees from exchanges like Binance or OKX (typically $0.10 – $0.30).
- TRON (TRC20): The industry standard for speed and reliability. Expect fees around $1.00 when sending from external wallets.
- Ethereum (ERC20): Only use this if you are moving massive amounts of capital from a cold wallet. The “gas” costs are rarely worth it for small top-ups.
- Arbitrum: An excellent Layer-2 option if you are bridging funds directly from DeFi protocols.
After selecting your preferred network, the app will generate a QR Code and a long alphanumeric Wallet Address. Never manually type this string of characters. One character error means your USDT vanishes into the void of the blockchain.
Always use the Copy icon next to the address. I also suggest “whitelisting” or saving this address in your sending exchange (like Binance) labeled as “My RedotPay Card” to streamline future transfers. Before moving to the next step, double-check that the network displayed on the RedotPay screen (e.g., BSC) exactly matches the network you select in your sending wallet. A mismatch here is the number one reason for “missing” deposits in the crypto card space.
| Network Type | Address Format Example | Expert Verdict |
|---|---|---|
| BSC (BEP20) | Starts with “0x…” | Best for daily top-ups; cheapest fees. |
| TRC20 | Starts with “T…” | Most compatible across all global exchanges. |
| ERC20 | Starts with “0x…” | High overhead; avoid for amounts under $500. |
Step 2: Transferring Funds from External Wallets or Exchanges (Binance, OKX, MetaMask)
Once you’ve grabbed your deposit address from the RedotPay app, the real action happens on the sending side. Whether you are moving funds from a Tier-1 exchange like Binance or OKX, or a self-custody wallet like MetaMask, the logic remains the same: precision is everything. One wrong character or a mismatched network, and those tokens are gone into the void.
Here is how we handle the transfer across the three most common platforms used by our community:
1. From Binance (The Exchange Powerhouse)
Binance is the most streamlined for RedotPay users because of its deep liquidity and clear interface. Log into your Binance account, navigate to Wallet > Fiat and Spot, and click Withdraw next to USDT.
- Paste your RedotPay address: Double-check the last four digits.
- Select the Network: This is where most beginners trip up. You must select BNB Smart Chain (BEP20) or TRON (TRC20) to keep costs under $1. Never use ERC20 here unless you enjoy paying $10+ in unnecessary gas.
- Verification: Complete your 2FA. Binance usually processes these in 2 to 5 minutes.
2. From OKX (The Low-Latency Alternative)
If you’re using OKX, the process is nearly identical but often slightly faster in my experience with their internal clearing. Go to Assets > Withdraw, select USDT, and choose On-chain.
- Network Selection: OKX will prompt you to select the withdrawal network. Again, stick to USDT-TRC20 for the best balance of speed and cost.
- Internal Transfers: Note that if you are sending from an OKX sub-account, ensure the funds are in your “Funding Account” first, or the transaction might hang.
3. From MetaMask (The Web3 Way)
Sending from MetaMask requires you to have a small amount of the native gas token (BNB for BSC, or ETH for Ethereum) to fuel the transaction. RedotPay supports BSC (BEP20), which I highly recommend for MetaMask users.
- Switch Network: Ensure your MetaMask is set to Binance Smart Chain.
- Click Send: Paste your RedotPay deposit address.
- Gas Settings: MetaMask will suggest a gas price. The “Market” setting is usually fine; there is rarely a need to “Aggressive” tip the validators for a simple card top-up.
Pro-Insider Table: Transfer Comparison
| Platform | Recommended Network | Estimated Fee (USDT) | Typical Speed |
|---|---|---|---|
| Binance | BEP20 / TRC20 | $0.33 – $1.00 | 3-5 Mins |
| OKX | TRC20 | $0.80 – $1.00 | 2-4 Mins |
| MetaMask | BEP20 | ~$0.15 (in BNB) | < 1 Min |
The most critical “industry secret” I can give you: The Whitelist Feature. If you plan on topping up your RedotPay card regularly, add your RedotPay deposit address to your exchange’s “Whitelist” or “Address Book.” This bypasses the 24-hour withdrawal lock some exchanges impose on new addresses and often simplifies the 2FA process for future top-ups, making the “crypto-to-coffee” pipeline much smoother.
Step 3: Converting USDT to Card Balance for Immediate Spending
Most first-time users assume they need to manually sell their deposited USDT for fiat before they can buy a cup of coffee. I see this misconception constantly. With RedotPay, your deposited USDT is your available card balance. There is no manual conversion or “fiat top-up” step required for immediate spending. The platform utilizes a real-time, auto-conversion engine that liquidates your USDT into the merchant’s local fiat currency at the exact moment your transaction is authorized via the Visa or Mastercard network.
To guarantee your virtual card pulls from your newly deposited USDT flawlessly, you simply need to configure your asset priority. I always do this immediately after a deposit clears on-chain:
- Step 1: Navigate to the Account or Card settings within your RedotPay app.
- Step 2: Locate the Payment Priority menu.
- Step 3: Drag USDT to the absolute top of the list. This strict instruction forces the routing engine to deduct from your Tether reserves first, ignoring any other fractional crypto dust you might hold.
Because you are operating with a Virtual Card, “immediate spending” requires bridging the card details to a frictionless payment gateway. You cannot hand a virtual string of numbers to a physical cashier. Within minutes of the USDT arriving, I map the virtual card directly to my primary mobile wallets to unlock tap-to-pay functionality.
| Payment Gateway | Expert Binding Tactics & Execution |
|---|---|
| Apple Pay / Google Pay | Tap “Add to Apple Wallet” or “Add to GPay” directly within the RedotPay app interface. I highly advise using this in-app button rather than manually typing the card details into your phone’s wallet. The API passes an encrypted token automatically, which drastically reduces AVS (Address Verification System) mismatch declines and anti-fraud flags. |
| Alipay / WeChat Pay | Manually enter the 16-digit card number, CVV, and expiry date into the Chinese payment apps. Insider Tip: Transactions under 200 RMB (approx. $28 USD) on these platforms currently waive the standard 3% international credit card fee, making this an incredibly efficient arbitrage route for spending USDT in mainland China. |
| Direct Online Checkouts | When inputting the card details for software subscriptions (like OpenAI, AWS) or e-commerce (Amazon), ensure the billing address you provide exactly matches the residential address used during your RedotPay KYC verification. Even a slight variation can trigger a payment gateway rejection. |
If you prefer to mitigate the risk of micro-fluctuations in the USDT peg—such as the temporary algorithmic de-pegs we witnessed in past market cycles—RedotPay does offer an in-app Swap function. You can manually execute a swap from USDT to USDC or directly into supported fiat currency accounts like EUR or GBP. However, for the vast majority of my daily transaction volume, I leave the balance sitting entirely in USDT. The spread applied during RedotPay’s auto-conversion at the point of sale is highly competitive and eliminates the friction of managing segregated asset buckets.
Comparison of Supported Networks: TRC20 vs. ERC20 vs. BSC
Choosing the right network for your USDT deposit isn’t just a technical formality; it’s the difference between paying $0.30 or $15 in “invisible” taxes. RedotPay’s infrastructure currently supports three primary arteries: TRC20 (Tron), ERC20 (Ethereum), and BSC (BNB Smart Chain/BEP20). In my experience managing high-volume crypto payments, selecting the wrong one is the #1 reason users see their balances “eaten” by gas fees before the card even swipes.
| Network | Speed (Avg.) | Typical Fee | Best For… |
|---|---|---|---|
| TRC20 (Tron) | 2–5 Minutes | $1.00 – $2.00 | Daily card top-ups & Binance withdrawals. |
| BSC (BEP20) | 1–3 Minutes | $0.30 – $0.80 | Micro-funding and decentralized wallet transfers. |
| ERC20 (ETH) | 5–15 Minutes | $5.00 – $30.00+ | Moving large institutional sums ($10k+). |
Transaction Speed and Confirmation Times
While Binance or OKX might mark a withdrawal as “Successful” in seconds, RedotPay requires a specific number of network confirmations to credit your app balance. BSC is the undisputed sprint champion here, usually hitting the required confirmations in under 90 seconds. TRC20 follows closely, generally settling within 3 to 5 minutes. ERC20 remains the outlier; during periods of high NFT minting or DeFi volatility, Ethereum congestion can leave your deposit in a “Pending” state for 20 minutes or longer. If you’re standing at a checkout counter waiting to fund your card for an immediate purchase, avoid ERC20 at all costs.
Gas Fees and Network Cost Optimization
The “Gas” you pay is the toll for using the blockchain, and it fluctuates based on traffic. Here is the insider reality of how these costs impact your RedotPay balance:
- The BSC Advantage: If you are moving $50 to pay for a Netflix subscription or a coffee, BSC is the most logical choice. The fees are negligible (often under $0.50), meaning almost 100% of your capital reaches the card.
- The TRC20 Standard: Most centralized exchanges charge a flat $1 fee for TRC20 withdrawals. It’s the “industry standard” for a reason—it’s predictable, widely supported, and rarely experiences the massive fee spikes seen on Ethereum.
- The ERC20 Penalty: Using ERC20 for a virtual card is rarely efficient unless you are already holding large amounts of USDT in a cold wallet like Ledger and want to avoid the extra hop (and extra fee) of swapping to another chain. Sending $100 via ERC20 when gas is high might result in you receiving only $85 on your RedotPay card.
I always advise my clients to double-check the Deposit Address in the RedotPay app specifically for the network they’ve chosen. A common “rookie” mistake is sending BSC funds to an ERC20 address. While they look identical (both start with “0x”), cross-chain recovery is a manual nightmare that most support teams will charge you a recovery fee to handle—if they can even recover it at all.
Transaction Speed and Confirmation Times
When you trigger a USDT transfer to your RedotPay wallet, you aren’t just waiting on RedotPay; you are waiting on the blockchain’s consensus mechanism. In our experience testing across various market conditions, the “pending” status usually lasts anywhere from 2 to 15 minutes, depending entirely on the network you selected during the withdrawal phase.
RedotPay requires a specific number of network confirmations before the USDT reflects in your available balance. This is a security measure to prevent double-spending. If the blockchain hasn’t “settled” the transaction, the app won’t credit your account.
| Network | Required Confirmations | Average Arrival Time | Reliability Factor |
|---|---|---|---|
| TRC20 (Tron) | 1 – 20 (Variable) | 2 – 5 Minutes | High (Industry Standard) |
| BSC (BEP20) | 15 | 3 – 6 Minutes | High (Best for small amounts) |
| ERC20 (Ethereum) | 12 – 64 | 10 – 20 Minutes | Moderate (Congestion prone) |
| Arbitrum / Polygon | Various | 1 – 3 Minutes | Extreme (Fastest execution) |
We see most users gravitate toward TRC20 because of its predictable block times. Tron generates a block every 3 seconds, meaning your transaction hits the “confirmed” threshold rapidly. On the other hand, if you use ERC20 during a period of high NFT minting or DeFi volatility, you might see your USDT sitting in “pending” for half an hour as Ethereum nodes struggle with the backlog.
The “Exchange Lag” Variable
It is a common misconception that the delay is always the blockchain’s fault. If you are sending USDT from Binance or OKX, the exchange performs its own internal security audit before broadcasting the transaction to the network. This “Internal Processing” can add an extra 2 to 5 minutes to the total wait time. Always check the withdrawal status on your exchange; if it says “Processing,” the clock hasn’t even started on the blockchain side yet.
Real-time Tracking
To see exactly where your money is, we recommend grabbing your TXID (Transaction ID) and plugging it into a block explorer like TRONSCAN for TRC20 or Etherscan for ERC20. If the explorer shows “Success” but your RedotPay balance is empty, it usually means the app is currently syncing the latest block headers—give it another 60 seconds and it will appear.
Gas Fees and Network Cost Optimization
Maximizing your USDT deposit value into RedotPay boils down to one critical decision: network selection. I’ve seen far too many users lose $10 to $25 in flat fees by blindly withdrawing via the Ethereum mainnet (ERC20). When your goal is to fund a virtual card for daily coffee or subscriptions, paying a 20% “tax” to the network is a rookie mistake that’s easily avoidable.
Currently, RedotPay supports several chains, and the cost disparity is massive. Based on real-time on-chain data and exchange withdrawal structures, here is how you should optimize your costs:
| Network | Average Fee (USDT) | Best Use Case | Expert Rating |
|---|---|---|---|
| Binance Smart Chain (BEP20) | $0.10 – $0.30 | Small to medium deposits from Binance or MetaMask. | ⭐⭐⭐⭐⭐ (Cheapest) |
| TRON (TRC20) | $1.00 – $2.00 | Standard for OKX, Bybit, and most global exchanges. | ⭐⭐⭐⭐ (Most Reliable) |
| Polygon (MATIC) | $0.01 – $0.10 | Direct transfers from DeFi wallets or Layer 2 dApps. | ⭐⭐⭐⭐⭐ (Fast & Cheap) |
| Ethereum (ERC20) | $5.00 – $30.00+ | Moving institutional-grade volume ($10k+). | ⭐ (Avoid for Card Funding) |
To keep your overhead at a minimum, I recommend the following internal strategies we use to bypass “Gas spikes”:
- The Binance-to-BSC Shortcut: If you are buying USDT on Binance, always select BNB Smart Chain (BEP20). The withdrawal fee is typically pennies compared to the $1.00 flat fee on TRC20. Ensure your RedotPay deposit address is toggled to “BSC” specifically to match.
- Monitor the “Gas Heatmap”: If you absolutely must use ERC20, never deposit during New York Stock Exchange opening hours or major NFT mints. Use a gas tracker to wait for Gwei levels to drop below 20. Funding your card at 3 AM UTC can save you $15 in overhead alone.
- Batch Your Deposits: RedotPay doesn’t charge a receiving fee, but your exchange charges a flat per-transaction withdrawal fee. Instead of sending $20 five times ($5.00 total fees on TRC20), send $100 once ($1.00 fee). You effectively increase your spending power by 4% just by consolidating.
- Check Exchange Promotions: Frequently, exchanges like OKX or Bybit offer “Zero Fee” withdrawal events for specific chains like Polygon or Arbitrum. Always check the withdrawal interface for a “Discount” tag before hitting confirm.
One industry insider tip: Always double-check the Destination Tag requirements if prompted, though RedotPay generally uses unique addresses per user for USDT. If you send via a cheap network but select the wrong chain in the RedotPay app, those “saved” fees will become a total loss as cross-chain recovery is often impossible or costs more than the deposit itself.
Pro Tips for Minimizing Fees and Maximizing Security
Maximizing your RedotPay experience isn’t just about moving funds; it’s about navigating the underlying blockchain architecture to keep your overhead low and your assets shielded. After years of testing various crypto-to-fiat ramps, I’ve distilled the process into a few non-negotiable strategies that separate power users from casual spenders.
Strategic Network Selection
While the app supports multiple chains, your choice of network is the single biggest factor affecting your bottom line. I consistently recommend Binance Smart Chain (BEP20) or Polygon over TRC20 for smaller transfers. While TRC20 used to be the gold standard for USDT, Tron network energy costs have spiked, often making BEP20 the cheaper alternative for deposits under $500.
| Network | Typical Fee (USDT) | Best For |
|---|---|---|
| Binance Smart Chain (BEP20) | $0.10 – $0.30 | Daily small-to-medium top-ups |
| Tron (TRC20) | $1.00 – $2.00 | Standard transfers when BSC isn’t available |
| Ethereum (ERC20) | $5.00 – $20.00+ | Large institutional-grade transfers only |
The “Dust” Management Strategy
One common mistake I see is users sending tiny amounts frequently. Each deposit triggers a network fee from your exchange or wallet. Instead of depositing $20 five times a week, do a single $100 deposit. You effectively slash your cumulative gas costs by 80%. Additionally, keep an eye on the RedotPay “Rewards” section; we often find vouchers there that can offset the 1% administrative fee on card conversions.
Advanced Security Protocols
Security in the virtual card space is about layers, not just passwords. Beyond the standard 2FA, I advocate for these specific “insider” habits:
- The “Just-in-Time” Funding Model: Do not treat your RedotPay card as a long-term storage vault. I keep the bulk of my USDT in a cold wallet or a hardware-secured account (like Ledger via MetaMask) and only transfer to the card what I intend to spend within the next 48 to 72 hours.
- Whitelisting Addresses: On your source exchange (Binance or OKX), whitelist your RedotPay deposit address. This prevents “clipping” malware from swapping the address in your clipboard for a hacker’s address during the copy-paste process.
- Toggle Card Status: Within the app, I keep my virtual card “Frozen” by default. I only “Unfreeze” it via biometric authentication seconds before hitting the “Pay” button on a merchant site. This renders the card details useless if they are ever leaked in a merchant database breach.
Exploiting Exchange Withdrawals
If you are moving USDT from an exchange, check if they offer “Internal Transfers.” Some platforms allow feeless transfers if they detect the recipient is part of a partner ecosystem. If you are using Binance, specifically look for the Binance Pay integration options which occasionally offer zero-fee promotional windows for top-ups to cards like RedotPay.
Troubleshooting Common Deposit Issues
Even with a streamlined app like RedotPay, the blockchain remains a “no-undo” environment. I’ve seen countless users panic when their USDT doesn’t show up within the expected ten minutes. Most of these issues stem from simple technical mismatches rather than lost funds.
If your deposit is currently in limbo, here are the high-probability culprits and how we fix them:
- The “Wrong Network” Trap: This is the most frequent support ticket we handle. If you sent USDT via the Arbitrum network but accidentally copied your TRC20 (Tron) address from the RedotPay app, the funds will not trigger the smart contract deposit.
- The Fix: Check the TxID (Transaction ID) on a block explorer like TRONSCAN or Etherscan. If the destination address exists on the wrong chain, you’ll need to contact RedotPay support with the TxID, though recovery isn’t always guaranteed and often carries a manual recovery fee.
- Insufficient Confirmations: Exchanges like Binance or OKX might mark a withdrawal as “Complete,” but RedotPay requires a specific number of network confirmations (usually 12-20 on BSC or 1 on TRON) before the balance reflects in your app.
- The Fix: Give it a 30-minute window. If the blockchain explorer shows “Success” but the app is blank, it’s simply a synchronization lag between the node and the app interface.
- Internal Transfer Delays: If you are using the Binance Pay integration within RedotPay, the API occasionally desyncs during high-traffic periods.
- The Fix: Do not attempt the transaction a second time. Navigate to your Binance “Funding Wallet” and check the transaction history. If it shows as “Pending,” the bottleneck is on the exchange side, not the card provider.
- Minimum Deposit Thresholds: RedotPay occasionally updates its minimum deposit requirements to prevent “dust” attacks on their wallets. If you send 1 USDT when the minimum is 10 USDT, the transaction might be ignored by the system.
- The Fix: Always double-check the “Deposit” screen in the app for the current minimum limit before hitting send from your external wallet.
| Status on Explorer | Potential Issue | Recommended Action |
|---|---|---|
| Pending / Unconfirmed | Low Gas/Miner Fee | Wait; the network is congested. |
| Success (Wrong Address) | User Error | Contact Support; funds may be lost. |
| Success (Correct Address) | API Sync Lag | Refresh app or clear cache in settings. |
Pro Insight: I always recommend doing a “test transaction” of the minimum allowable amount if you are moving more than $500. The $1-2 in extra gas fees is a cheap insurance policy against a permanent “fat-finger” error on a high-value transfer.
FAQ
Based on my experience helping thousands of users navigate the nuances of crypto-linked cards, these are the questions that actually matter. We’re moving past the basic setup and getting into the technical friction points that can save you money and headaches.
| Question | The “Insider” Answer |
|---|---|
| What is the minimum USDT deposit amount? | Currently, the platform typically requires a minimum of $10 USDT. Depositing anything less often results in the funds being lost in the “void” of the blockchain, as it won’t trigger the internal credit mechanism. |
| Which network is objectively the cheapest? | Skip ERC20 unless you enjoy burning money. Use BSC (BEP20) or Polygon for fees under $0.50. TRC20 is the industry standard for reliability, but Tron network fees have spiked recently, often costing $1–$2 per transfer. |
| Can I deposit USDT directly from a CEX like Binance? | Yes, and it’s the preferred method. Use the “Withdraw” function on Binance, select USDT, and paste your RedotPay deposit address. Just ensure the network selected on both ends is identical. |
How long does it take for my USDT to show up?
It isn’t about RedotPay; it’s about the blockchain. Once the transaction hits the required number of confirmations (usually 12–15 on BSC or 20 on TRC20), it appears in your app within 60 seconds. Total time is usually 2 to 5 minutes. If it’s been 30 minutes, check the TXID on a block explorer before contacting support.
Why is my “Available Balance” different from my “Total Assets”?
This is a common point of confusion. Your USDT sits in your Wallet. To spend it on the virtual card, you must ensure it’s either converted to USD or that you have enabled the “Auto-Deduct” feature in the payment settings. The card draws from the wallet balance based on a real-time conversion rate during the transaction authorization.
Is there a limit to how much USDT I can add?
For Tier 1 (Basic KYC) users, there are daily and lifetime caps that are quite restrictive. If you plan on moving more than $2,000, complete the advanced verification. Once verified, limits expand significantly, allowing for high-ticket purchases like flights or electronics.
Can I refund a purchase back to the USDT wallet?
When a merchant issues a refund, it returns to the card’s USD balance, not as USDT. We’ve seen these take 3–7 business days to process. Don’t expect an instant crypto reversal; the legacy banking system (Visa/Mastercard) still handles the tail end of the transaction.
What happens if I send USDT via an unsupported network (e.g., Arbitrum)?
In most cases, those funds are unrecoverable. RedotPay’s infrastructure only “listens” to specific smart contracts on supported chains. Always send a small test amount if you are experimenting with a new bridge or a less common network layer.
🔥 RedotPay Virtual Card (Top Pick 2026)
The RedotPay Virtual Card lets you top up with USDT, BTC, or ETH and pay anywhere online — instantly and securely.
- ✅ No annual fee
- ✅ Instant virtual card
- ✅ Supports USDT, BTC & ETH
- ✅ Works with Google Ads & Facebook Ads
- ✅ Global payments, fast & secure
- 🎁 Get $5 welcome bonus
Top up crypto, spend worldwide. Perfect for ads, subscriptions, and daily payments.